DHM PROJECTS
DHM Projects offers you the possibility to create your own projects. It allows you to assign a title, description and list of items with notes and specifications for each project you create, all directly online on our platform dhm-online.com
You can use this service only if you have registered with our platform.
Once you have registered or logged into your My DHM account, you will have three ways to create a project:
- Through the "My Projects" section that you can find within your account. In this page you'll find all your personal projects; in case you haven't created any yet, the page will be empty. To proceed with the creation of a project just select "Create Project" and follow the directions that will be shown on the screen. After finishing the procedure, if it is successful you will see the words "project created successfully";
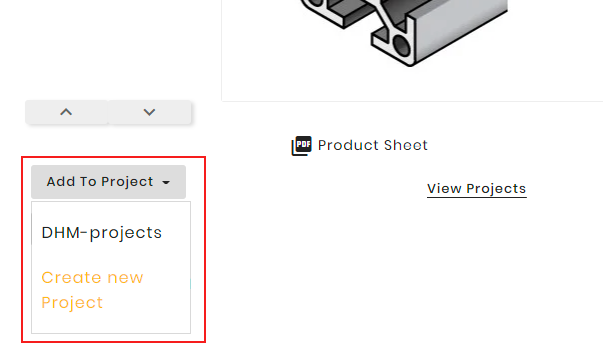
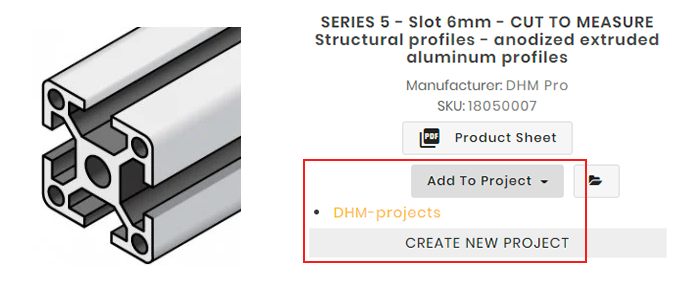
- Through the button "Add to project" that you find inside each product page. If you have not yet created any project you will only find the words Create new project, otherwise, in addition to this, you will find the names of the projects you have already created;
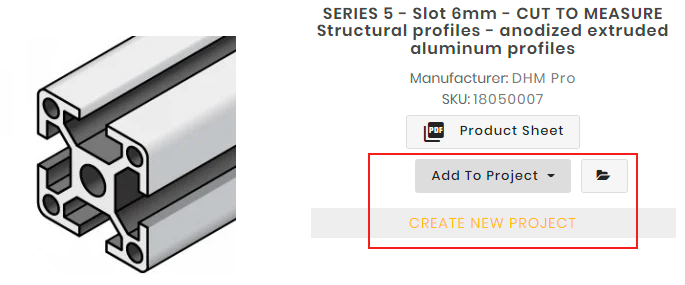
- The same procedure happens when you view the products in Catalog mode, in this mode you will see the "Add to project" button.
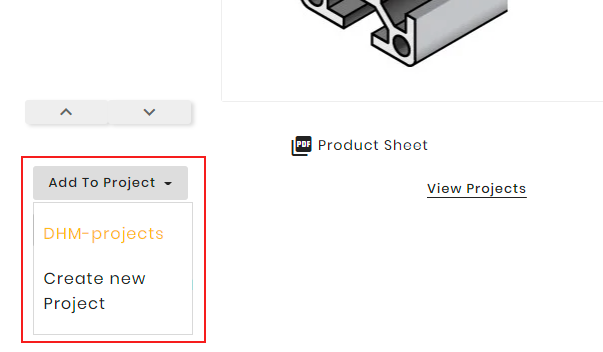
Adding products to your projects is simple: use the "Add to project" button that you find on every product page or when you view the products in Catalog mode. If you have created several projects in your profile, this function allows you to choose the specific project to which you want to add the product you have selected. Remember that if you want to add a specific quantity of the product, fill in the quantity field first.
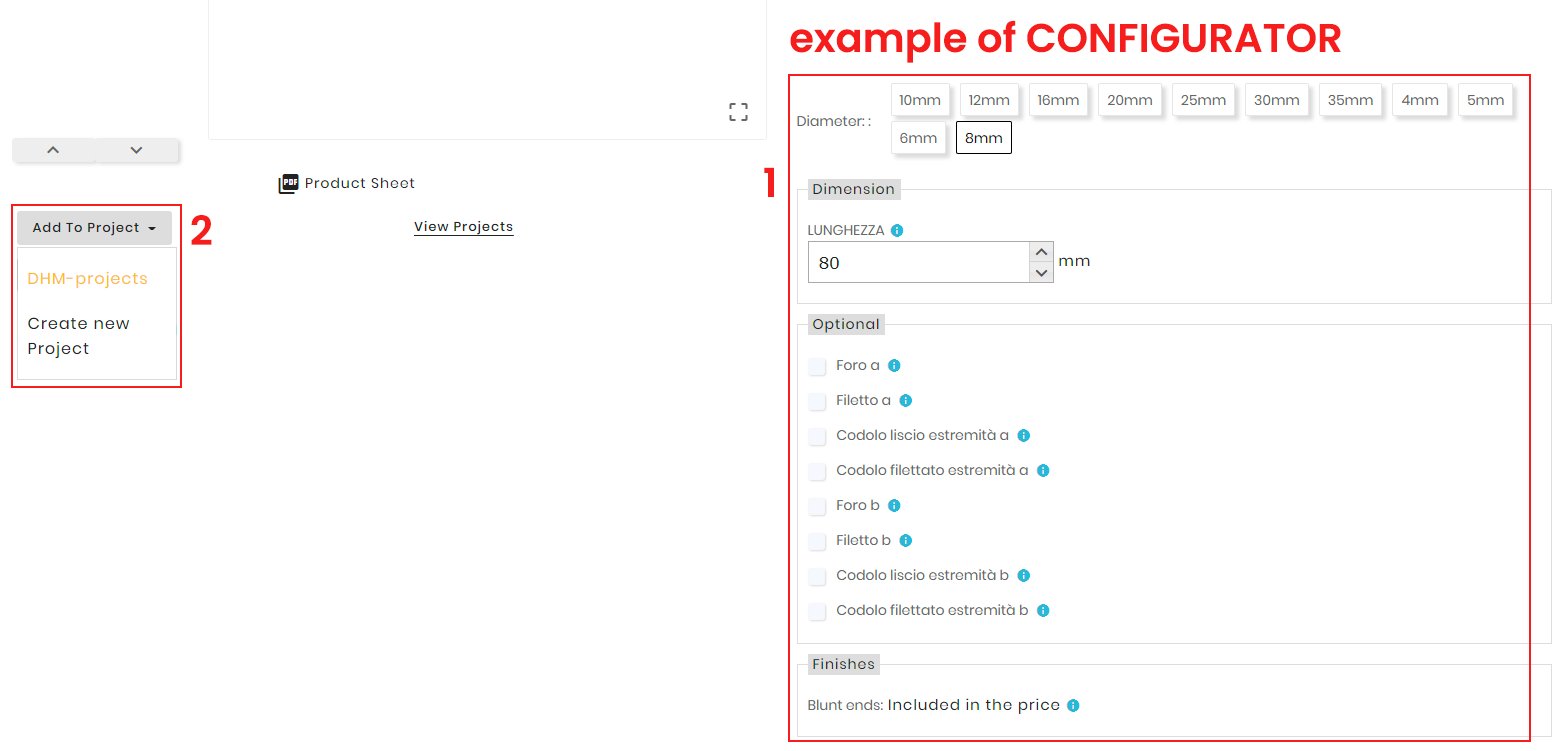
Sure, we've thought of that too! To add a custom item through our configuration service (bars, slabs or profiles to size) you must follow the same procedure used to add a normal item.
The addition must be done after configuring it (see the answer to the question "How do I insert articles within a project?").
The article you add inside the project contains all the features you set during configuration, once inside the project this cannot be changed, if you want to change the specifications you have to add a new article and remove the previous one.
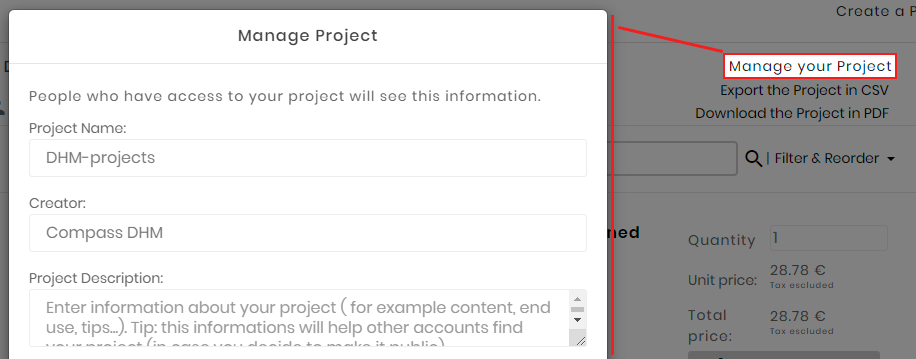
Once the project is created you can edit its data through the "Manage Project" item inside the specific tab in the My-DHM - My Projects section of your account. This allows you to manage information that will be visible to people who will have access to your project, such as the name of the Creator, the Project Name and the description.
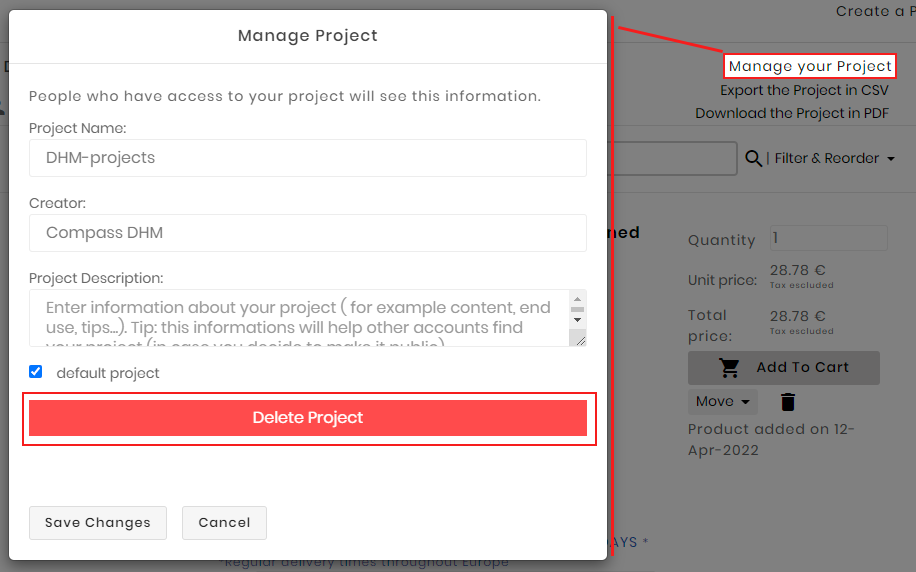
To permanently delete a project you have to select the "Manage Project" item, which you can find inside each project tab, and then select "Delete Project".
Attention: there is a double confirmation to delete the project. Once the action is confirmed, the selected project will not be recoverable in any way.
Within the project tab, in addition to Project Management, you can take advantage of a number of actions such as Downloading the project to PDF, Exporting to CSV, sharing, printing and duplicating. Let's see specifically:
- Download PDF Project
Allows you to download the PDF version of the Project. This contains the specifics of the project (its ID, creation date, date of the last update - at the time of PDF creation), its name, creator, topic and description). It also includes the list of products with the characteristics of each one (description, price per unit, quantity, total price and possible product configuration);
- Export the Project to CSV
Allows you to download a CSV version of the Project. This contains the data relating to the products present in the project (SKU, product name, quantity, price per unit, total price, any product attributes, Ean13 and the manufacturer);
- Print project
Offers you the possibility to print the project directly from the browser without having to save it as a PDF or CSV file inside your computer;
- Duplicate project
Allows you to create an identical copy of your project, duplicating it. The copy that is created contains the same data as the original project;
- Share Project
Opens a pop-up containing the project url that you can copy and share wherever you want and with whomever you want.

Do you have a project containing a large number of articles and want to find one in particular but don't want to waste too much time? You can help yourself with the search bar at the top of each project tab (by entering the name of the item). You also have the possibility to filter and sort items by Name or by Date Added.
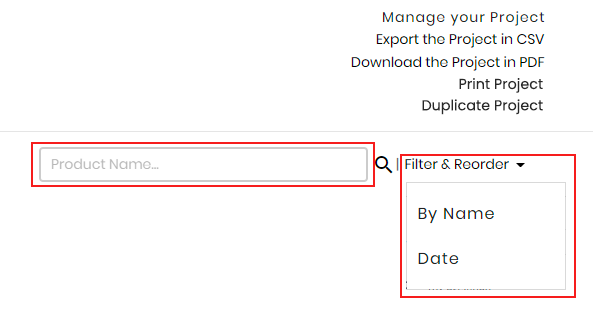
Within each project tab you will be able to view all the items you have added. For each of these you can see the following information:
- Item name
- Manufacturer name
- Any variants
- Any product configurations
- Stocks
- Quantity
- Unit price
- Total price
- Possible discounts: volume discounts, personal discounts
Note: depending on the type of account, prices will be visible with or without vat

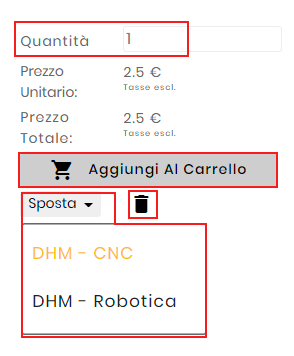
In addition to seeing the technical characteristics of each item you've added within your projects, the service offers you the ability to:
- Add the single product to your cart
- Delete the single product from the project list
- Move the product from one project to another.
You can make this move through the "Move" button that you find inside each product line. This function opens a drop-down menu with the names of all the projects you have created, and to move the item just click on the name of the project you want to move it to (if you have only created one project, the list will be empty).
Note: moving the article removes it from the original project.
Projects are personal and tied to the account that creates them. You can decide whether to keep your projects private, so only those who have access to your account will be able to see them; alternatively you can make them public. In this case they will be visible to everyone within the dedicated page on our platform.
To make your project public you have to select the "Publish your project" option that you can find in the dedicated tab in the "My projects" section of your account.
If you make your project public you will still be able to edit the texts and products that are within it, just like a private project, only that the changes will be public and visible on the page https://www.dhm-online.com/projects-public.
Warning! After publishing the project it can't be changed back to private!
If you want your project to be no longer visible to everyone, you'll have to delete it within its tab under "Manage Project".

You can see the list of public projects in the dedicated page within our platform(www.dhm-online.com/progetti-pubblici).
Within the open project tab, you can see the list of products with their descriptions (if the creator has included them) and a series of buttons that allow you to perform specific actions.
Let's see them below:
- Download PDF Project
Allows you to download the PDF version of the project. This contains the specific characteristics of the project (its ID, creation date, date of the last update - at the time of PDF creation), its name, creator, topic and description). It also includes the list of products with the characteristics of each one (description, price per unit, quantity, total price and possible product configuration);
- Export the Project to CSV
Allows you to download a CSV version of the Project. This contains the data relating to the products present in the project (SKU, product name, quantity, price per unit, total price, any product attributes, Ean13 and the manufacturer);
- Print project
Offers you the possibility to print the project directly from the browser without having to save it as a PDF or CSV file inside your computer;
- Share Project
It opens a pop-up containing the project url that you can copy and share wherever you want and with whom you want.
- Save a copy
Allows you to create a copy of the project within your Personal Collection. In this way you can edit the project as you like (you are not going to edit the public project, but the copy you have created that can be seen only by those who have access to your account).

Yes, it is possible to add to the shopping cart an entire project or even just a part of the products that are in it. This applies to both private and public projects (the whole procedure takes place within the project tab).
To add the whole project to the cart just click on the button "Add Project to Cart" which is located at the bottom right at the end of the list of products.
If instead you want to add to cart only certain products, select them by checking the box at the top left of each product line. Once you have selected the products, click on the "Multiple selection" dropdown menu at the top of the product list - next to the project description, and select "Add to cart selected". If your project contains many products, take advantage of Multiple Selection.
If you don't see the products added right away from the cart preview, try reloading the page.
This service includes the function of sharing the project in two ways.
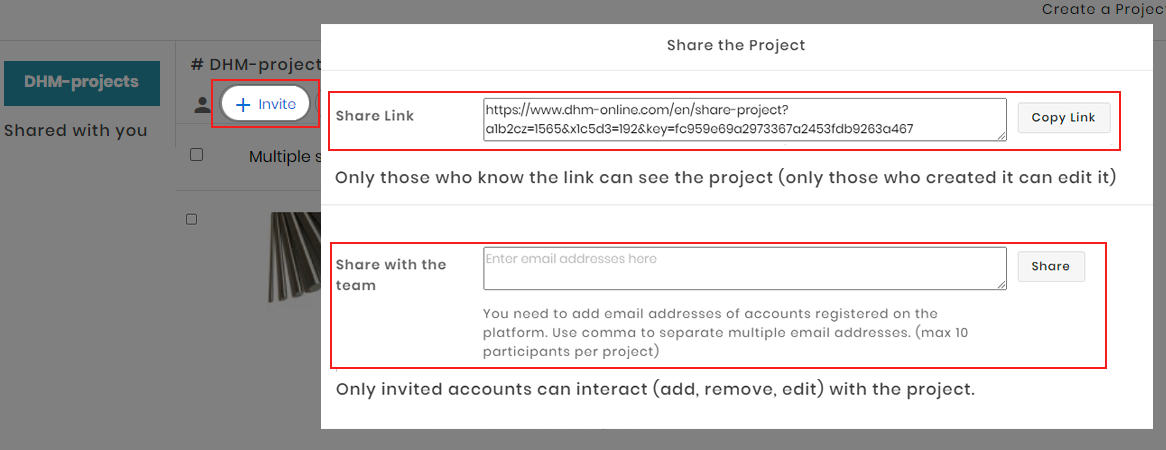
First of all you have to select the "+ Invite" button that you find inside the project tab, doing so will open a pop-up containing the procedures for the two modes:
- Share the link: by copying the link that is created by our platform, you can share your personal project with who you want and where you want (only those who created the project can edit it, those who have the link can only view it).
- Share with your Team: you will have to insert in the box the email addresses of the people you want to share the project with. To separate multiple email addresses use the comma. You can add up to a maximum of 10 participants per project. Only invited accounts can interact, so add and remove products, as well as edit notes for each item.
Note: the email addresses you can use for team sharing must belong to accounts already registered in our platform.
When you open a project through a link that has been shared with you, you view it within a dedicated page.
The view of the project opened through a shared link allows you to see the name of the project, download it in PDF, export it in CSV and save a copy. You will also be able to add the whole project, just a part or a single product to the Shopping Cart and see the technical characteristics of each single article.
In order to modify the project that has been shared with you you must select the button "Save a copy" in this way you will create an identical copy of the project in your personal Projects section. You will then have the possibility to modify it as a project that you have personally created.
When working on a project for which you've been invited to collaborate through the "Share with Team" option you'll have the ability to add and remove items and invite via email other accounts to edit the project. The maximum limit of people that can be invited remains 10 (this limit is based on the project, not on each account that can edit it).
What you can't do is: edit the name, description and creator of the project (function "Manage Project"), make it public and delete it. These features are only accessible to the original creator of the Project.
To see the list of projects that have been shared with you you need to enter the "My Projects" section of your My-DHM account. You can find them along with the list of your projects, under the heading "Shared with You".
To view the list of accounts with which you have shared a Project you must select the "Manage Project" item located within each Project tab. Only Project creators can see this list. If needed, previously added contacts can be removed.


